Send automated abandoned cart emails to reach out to contacts who leave your website without completing their purchase and recover lost sales.
Why send abandoned cart emails?
An abandoned cart automation sends an email, or a series of emails, to contacts who add products to their cart but leave your website without completing their purchase. These emails serve as a reminder and encourage customers to finalize their transactions.
| Brevo uses its tracker to monitor when a contact abandons their cart. Once the contact is identified, they will enter the abandoned cart automation and receive a reminder email after a specific delay. |
Expand the accordions below to view real examples of abandoned cart emails, what to include in them, and the best times to send these emails:
Below are three examples of real abandoned cart emails and why they work:
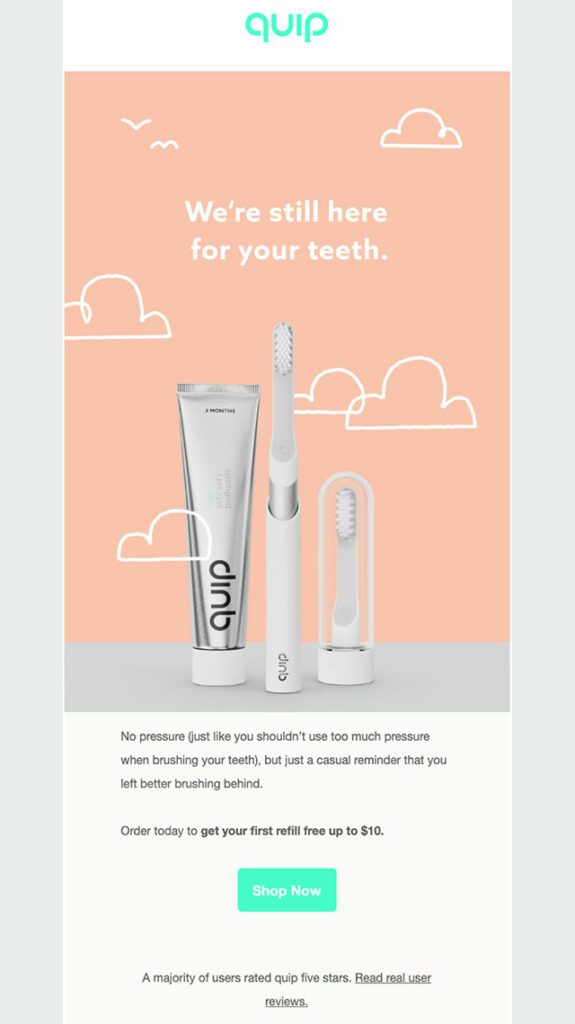 |
This Quip email example reminds customers of their unfinished virtual shopping trip and offers a bonus item. According to a study by Harris Interactive, free gifts can increase brand loyalty by up to 90%. |
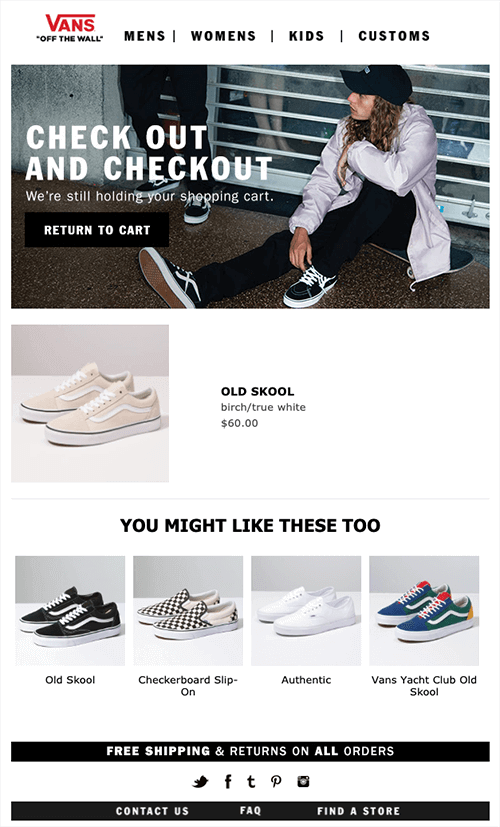 |
Vans' key strength is its product recommendations. The company shows popular items to reignite interest.
|
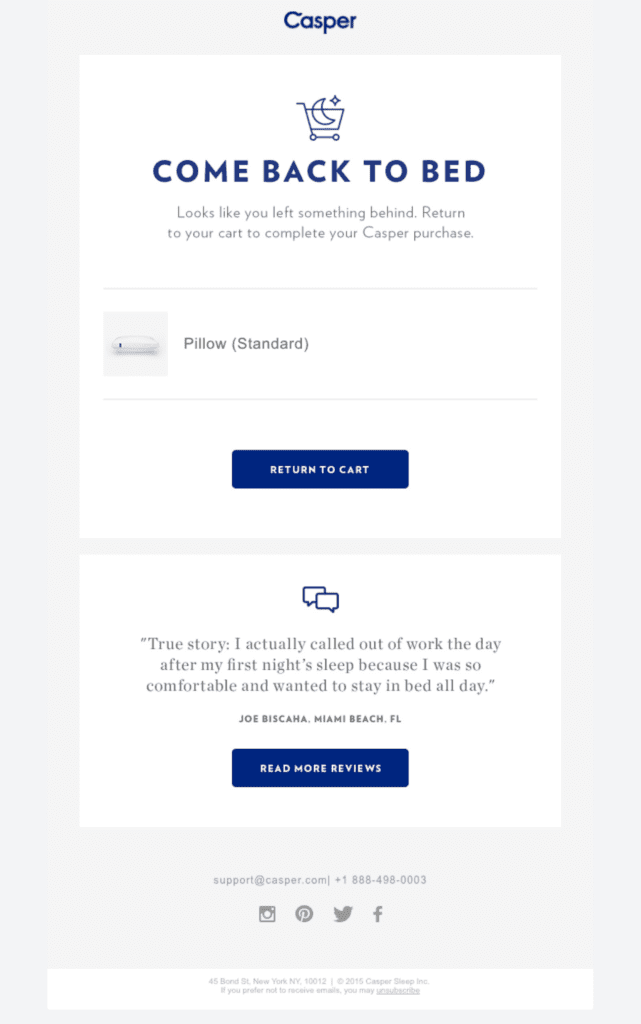 |
This cart recovery email from Casper features a customer review as a secondary call-to-action. The email also includes:
|
👀 Write a catchy subject line
When it comes to email marketing, the subject line is crucial. It's the first thing your recipients see, so it's important to make it count. You could mention any discounts or free shipping in the subject line itself to entice them to click and complete their order.
🖱️ Include a clear call-to-action button
Make it easy for your customers to find their abandoned cart and follow through by including a clear call-to-action button in your email. For example, you could suggest that they:
|
|
😱 Instill a little fear of missing out (FOMO)
Subject lines that create a sense of scarcity and fear of missing out can effectively reduce cart abandonment. This could include a warning that a product may sell out quickly, a limited-time discount, or other similar tactics.
🙋 Personalize each cart abandonment email
Abandoned cart emails should be personalized to the customer you're sending them to by including the items left in their cart and addressing them by name, just as if you were assisting them in person. This can be done using Brevo's Template Language.
🚚 Offer free shipping
Offering free shipping for purchases above a certain amount can be an effective strategy to encourage customers to complete their transactions. Not only does this create an incentive for customers to add more items to their cart, but it also provides a sense of satisfaction and value to the customer, knowing that they are receiving something extra with their purchase.
The abandoned cart email can be part of a series of emails triggered by specific rules and pre-selected events. Typically, an abandoned cart email series consists of the following:
- The first abandoned cart email is sent 1 to 2 hours after cart abandonment is detected. It can be a friendly reminder that shows the abandoned items in the customer's cart and encourages them to return.
- The second email is typically sent 24 hours after the cart is abandoned, reminding customers that items are going fast and creating a sense of urgency.
- Finally, a third email can be sent three days after detecting an abandoned shopping cart. This is the perfect time to offer a coupon code or limited-time discount.
Before you start
Make sure you have installed the Brevo tracker on your website and set up our three purchase events (cart_updated, cart_deleted, order_completed).
➡️ To learn more, check our dedicated article What is the Brevo tracker and how to install it?.
Select the abandoned cart automation
Brevo offers a pre-configured abandoned cart automation. To select it:
- Go to Automations > Workflows.
- Click Create an automation.
- Select the Abandoned cart pre-built automation.
- Under Email template language, select the language in which the default templates in this automation will be generated.
- Click Create automation.
You will now be automatically guided through a series of three steps to create your abandoned cart automation.
Step 1/3: Let contacts enter the automation when they add a product to their cart
The trigger for the abandoned cart automation is called "Cart updated". This trigger allows contacts to enter the automation as soon as they add a product to their cart.
- (Optional) Refine the "Cart updated" trigger by applying Event filters. For example, you could choose to start the automation only if the contact's cart total exceeds $10.
- Under Ecommerce filters, click Add filter.
- Click Add filters and choose the conditions you want to apply to refine the trigger. For this example, we selected the condition Shopping cart total > is greater than > 10.
- Click Add filters.
- Under Ecommerce filters, click Add filter.
- (Optional) Restrict your automation to contacts who meet specific criteria by applying Contact filters. This gives you more control over which contacts can enter the automation. For example, since abandoned cart emails are considered marketing emails, you can ensure that only contacts who have subscribed to receive marketing emails can enter the automation.
- Under Contact filters, click Add filter.
- Click Add filters and choose the conditions you want to apply to control which contacts can enter the automation. For this example, we selected the condition Email > Email campaigns subscriptions > Subscribed.
- Click Add filters.
- Under Contact filters, click Add filter.
- Click Next.
Step 2/3: Add a delay before sending the abandoned cart email
After a contact enters the automation, they will go through a waiting period before receiving the abandoned cart email. Typically, the first abandoned cart email is sent 1 to 2 hours after the cart abandonment is detected.
- Select the delay period you want contacts to wait between adding their last product to their cart and when the abandoned cart email is sent.
- Click Next.
If a contact completes their purchase during this delay, they will automatically be removed from the automation, and no email will be sent to them.
Step 3/3: Send the abandoned cart email
If the contact still hasn't completed their purchase after the delay, we'll send them an abandoned cart email. Typically, this email includes details about the products left in the cart and may offer discounts or incentives.
The default abandoned cart email template includes all the essential elements to help you recover lost sales. To view what the default email template looks like, expand the following accordion:
|
To edit the default email template:
- Under the email preview, click Edit.
- Design your email template by updating its content and adding any extra content or blocks as needed. To learn how to use the Drag & Drop editor, check our dedicated series of articles.
-
The default abandoned cart email template includes a Dynamic content block that personalizes each email with a list of items left in the recipient’s cart. This block contains variables that are dynamically replaced when the email is sent to display the following details about each item:
- Image
- Name
- Currency
- Price
- Variant ID name
- Quantity
If needed, you can modify the data source or update the default variables in the dynamic content block. To learn more, check our dedicated article Personalize your emails with event data.
- (Optional) Click Preview & test to verify personalized details, such as the products left in the cart, and review the design and layout of your email template. You can preview your email using JSON data or information from a previous abandoned cart event.
- Once you're done, click Use this design in automation in the top bar of the email editor to save your email template and return to the automation editor.
- Configure the settings of your email template:
-
Event data (latest instance of the "Cart updated" event)
- Subject line and preview text
- Sender email address and name
- Additional settings, including email sending time, email copy, reply-to address, tags, attachment, profile update form, unsubscribe form, and more.
-
Event data (latest instance of the "Cart updated" event)
- Click Save.
Activate the automation
Once everything is set up, you can activate the abandoned cart automation:
- In the top bar, click Activate automation.
- The following audience settings are already configured for the abandoned cart automation:
- Re-entry after exit: Contacts will re-enter the automation if they exit it once and abandon their cart again.
-
Exit conditions: Contacts will exit the automation if:
- They complete their purchase.
- They delete an item from their cart.
- Restart conditions: Contacts will restart the automation if they add an item to their cart again.
- Click Activate automation.
Test the abandoned cart automation
To ensure that your automation works well and that the email sent includes the personalized list of abandoned items, it is recommended that you test it yourself. For the abandoned cart automation, here is a real test scenario you can perform:
- Create or log into an account on your website.
- Add a product to your cart.
- Abandon your cart and wait for the delay you set at Step 2/3: Add a delay before sending the abandoned cart email.
- Test the remaining steps by updating, removing, and purchasing products from your cart.
This should trigger the automation and give you an accurate sense of its functionality.
🤔 Have a question?
If you have a question, feel free to contact our support team by creating a ticket from your account. If you don't have an account yet, you can contact us here.
If you’re looking for help with a project using Brevo, we can match you with the right certified Brevo Agency partner.